
How To: Install Window Coverings and Save on Your Utility Bills
")
Cold windows can be a real budget killer when you’re heating your home. But did you know that window treatments can reduce heating and cooling bills by as much as 25%? Follow these simple steps to wrap your windows this winter and your wallet will thank you.
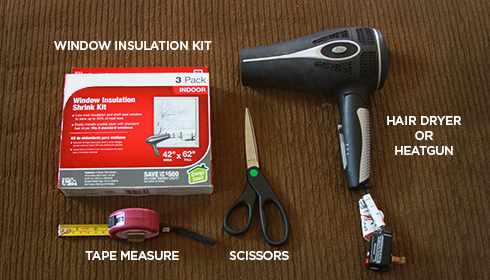
What’s needed:
Step 1: Clean your windows
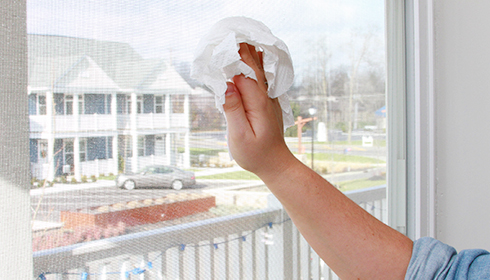 Wipe down all the edges of your windows and sills with mild soap and water or rubbing alcohol. Make sure to remove any obstructions that might prevent a good seal such as nails, putty, or splitting wood on wood sashes. While you’re there, give the panes a nice cleaning, too.
Step 2: Measure your windows.
 Don’t worry: you don’t have to be exact here. If you have a tape measure, just get the height and width of all the windows you’ll be wrapping. It’s a good idea to make a chart or quick sketch of the numbers, locations, and sizes of each of your windows for later at the store. No tape measure? No worries; most home window sizes are around 24 to 30 inches wide and 48 to 56 inches tall. In a pinch, a quick photo with your smartphone or tablet can help get you close to the right size.
Step 3: Select the kit for you.
 Window insulator (or shrink film) kits are available at your local hardware store, online, and even at some larger grocery stores during the cold weather season. The kits are divided out by window size, or standard groupings such as one large picture window and three smaller windows. Your kit should include a roll of double-stick tape, instructions, and a nice packet of clear film. You might want to grab an extra roll of double-stick tape (usually found next to the window film kits) while you’re at it.
Optional step: Get a hairdryer or heat gun.
If you don’t already have a hairdryer you might want to purchase an inexpensive one. Or, if you don’t want to make an extra trip, stop by the tools section at the hardware store for a heat gun. For this project any heat gun that can match the temperature of a hairdryer (around 150° F) is fine. Select one with a wide nozzle since broad, even heating is best for the last step.
Step 4: Lay out the plastic.
 Clear a space on your floor or large table and unfold the packet of durable plastic film. Once unfolded you might have to cut your window sizes out of the plastic according to the kit’s instructions. Make sure you cut in straight lines so you don’t accidentally make the film too small! Once prepared, it’s a good idea to lay out the pieces next to each appropriate window.
Step 5: Prep the windows.
 Apply the double-stick tape to the outermost edge of your window being careful to press firmly as you go for a good seal. The strips should be along the window sash where it meets with the sill. In some cases, there might be a window crank handle or sash bolt at the bottom. If this happens, you should apply the tape outside of the obstruction area. The instructions in your kit should have an illustration of this.
Step 6: Apply the plastic.
 Once the tape is surrounding the window, gently peel the protective paper off the strip along the top of the window. Hold up the plastic to make sure you’ve got the correct orientation and place the top edge about three finger widths out from the tape. The plastic in the kits is intentionally oversized, so you want to have some extra film beyond the window edges. Peel the paper off one side of the window and push the film into the adhesive. You will want to avoid any folds or crinkles as you do this. Finish the window at the bottom by gently pulling the film somewhat tight.
Step 7: Shrink the wrapping.
 After your window film is fully taped up, use the hairdryer or heat gun to remove all the wrinkles. Start in the middle of the film and make a circular motion toward the perimeter of the window. You will begin to see the plastic tighten up and any creases will magically disappear. You can chase significant creases toward the edges with relative ease using the hot air. The end result is a beautifully clear membrane that traps cold air before it enters your house. As a final touch trim the overlapped plastic back to about a pencil width from the tape. Wrapping your windows in plastic shrink film is one of the easiest and most inexpensive ways to make your home winter-ready and energy-efficient. For even more tips on taking control over your energy costs, check out our website at IGS.com.
Learn more about saving on electricity
Additional Linkshttp://energy.gov/energysaver/articles/improving-energy-efficiency-existing-windows
http://www.erc-co.org/diy-window-weatherization/
http://homeenergychecklist.org/plastic-window-insulation.html